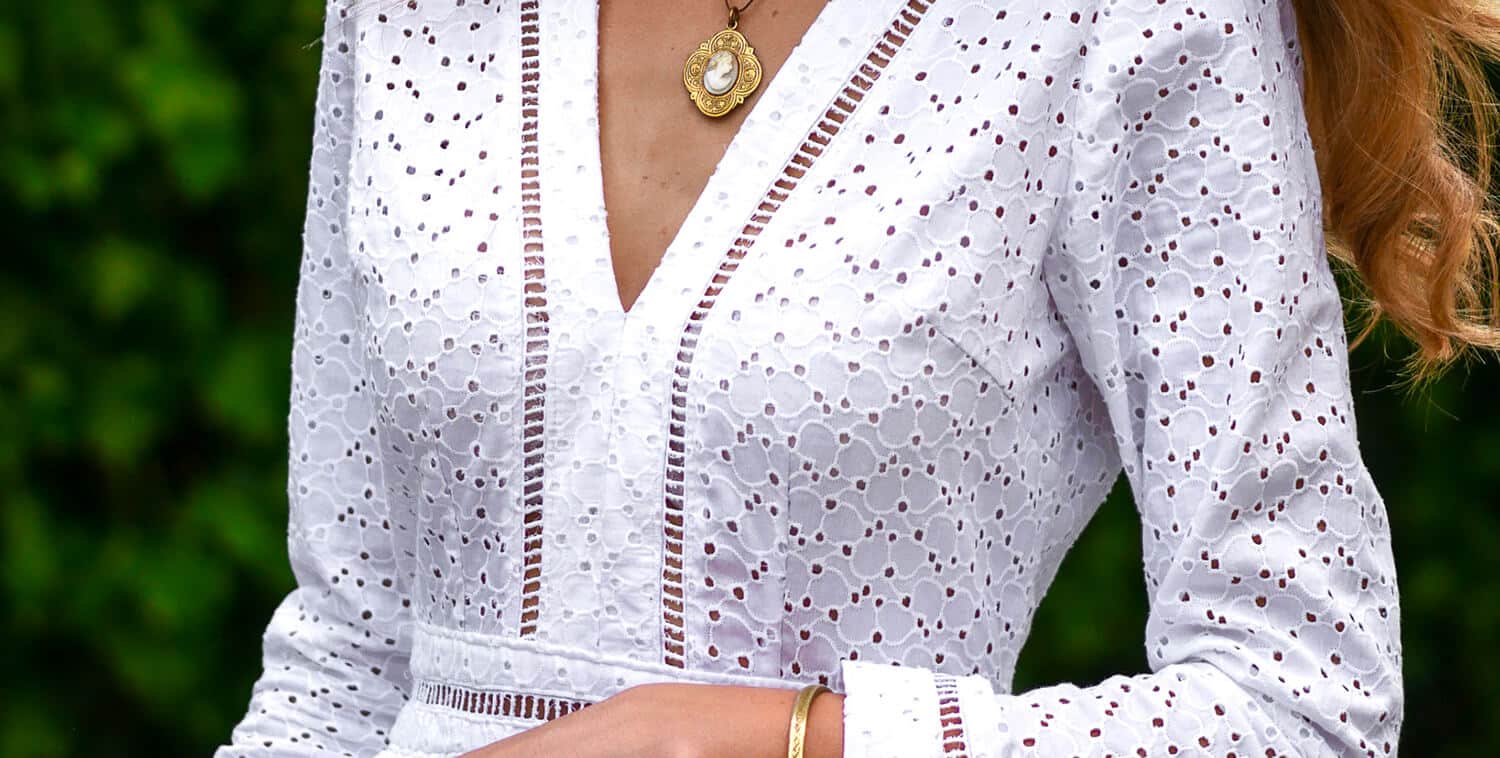
How to get a nice V neckline on your Aquarius dress at the perfect height for you? Well, as I always say, we all are different and no pattern can fit everyone out of the box. In this post, we will cover how to adjust the depth of the neckline to make it deeper or more modest depending on your height and desired style. This is an easy adjustment, all you will need is your sewing pattern, paper, a pen, a ruler and scissors! Let’s get started.
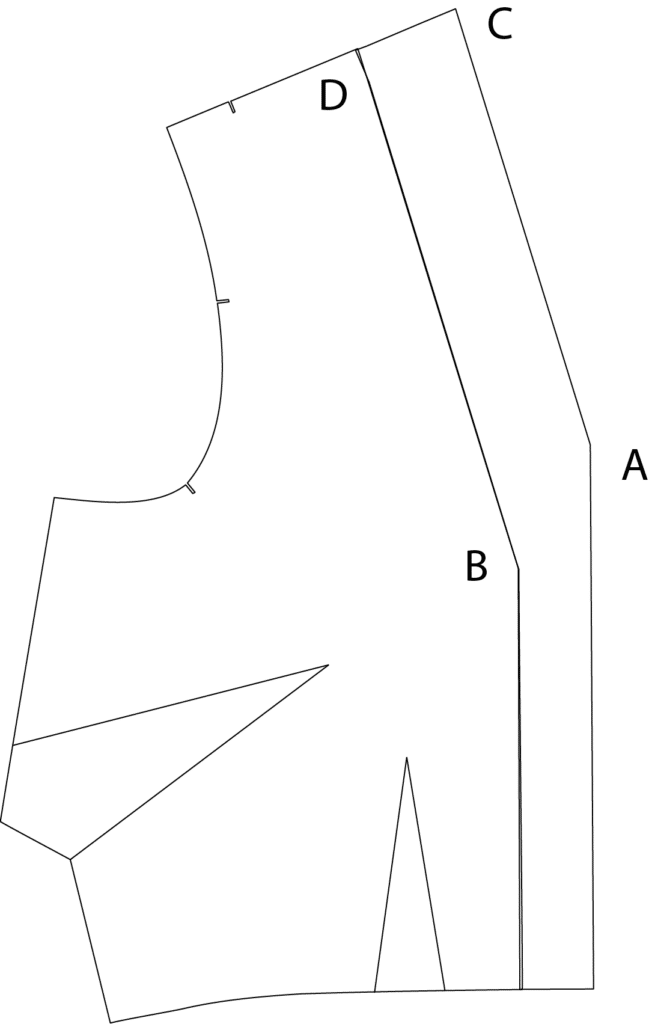
1 – Make a toile
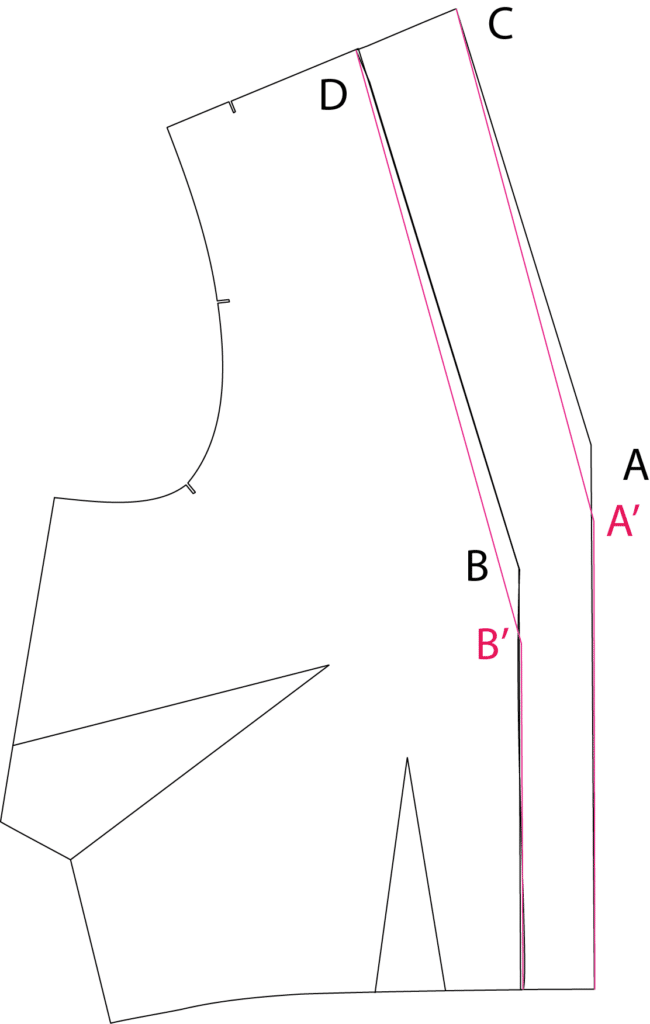
First, make a toile following the method described in the instructions booklet. You will obtain the pattern piece shown here, after cutting the yoke in half and taping one half to the front bodice piece. Note the points we will be looking at: A is inward corner of V neckline. B is the point where bodice front makes an angle. C is the highest point of shoulder. D is the junction between bodice and yoke at shoulder.
2 – DETERMINE THE DESIRED HEIGHT OF THE NECKLINE
By trying the toile/muslin on the intended wearer, determine exactly how low you want the neckline to be. For this example, let’s say we want to lower the neckline by 2cm. So mark a point A’ 2cm below the existing point A, and a point B’ 2cm below the existing point B. Draw a line between C and A’, and between D and B’.
3 – CUT THE NEW PIECES
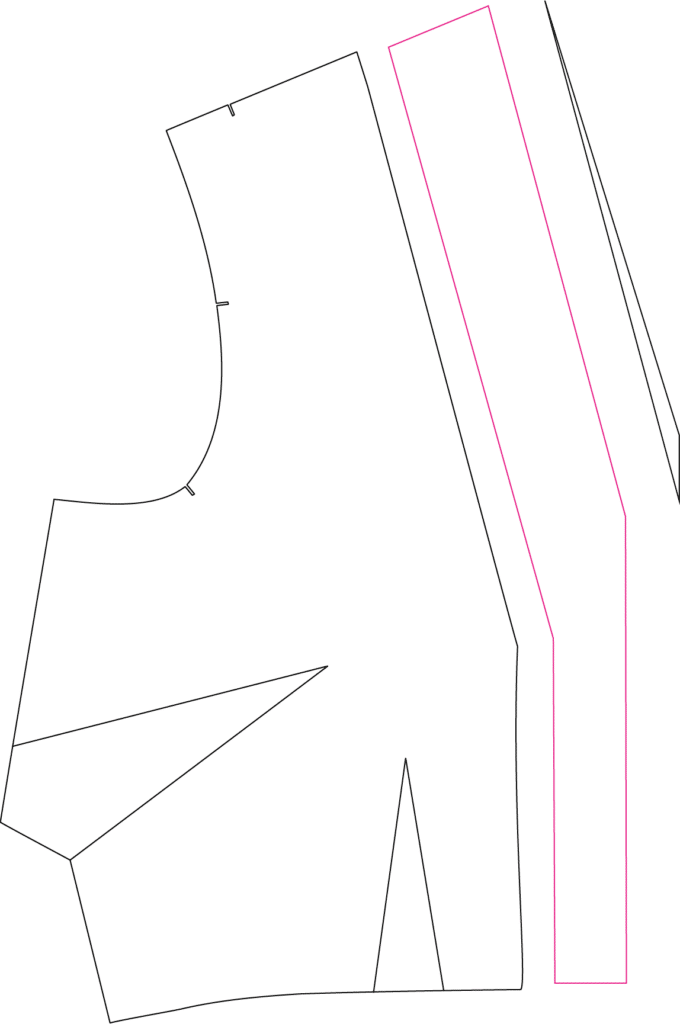
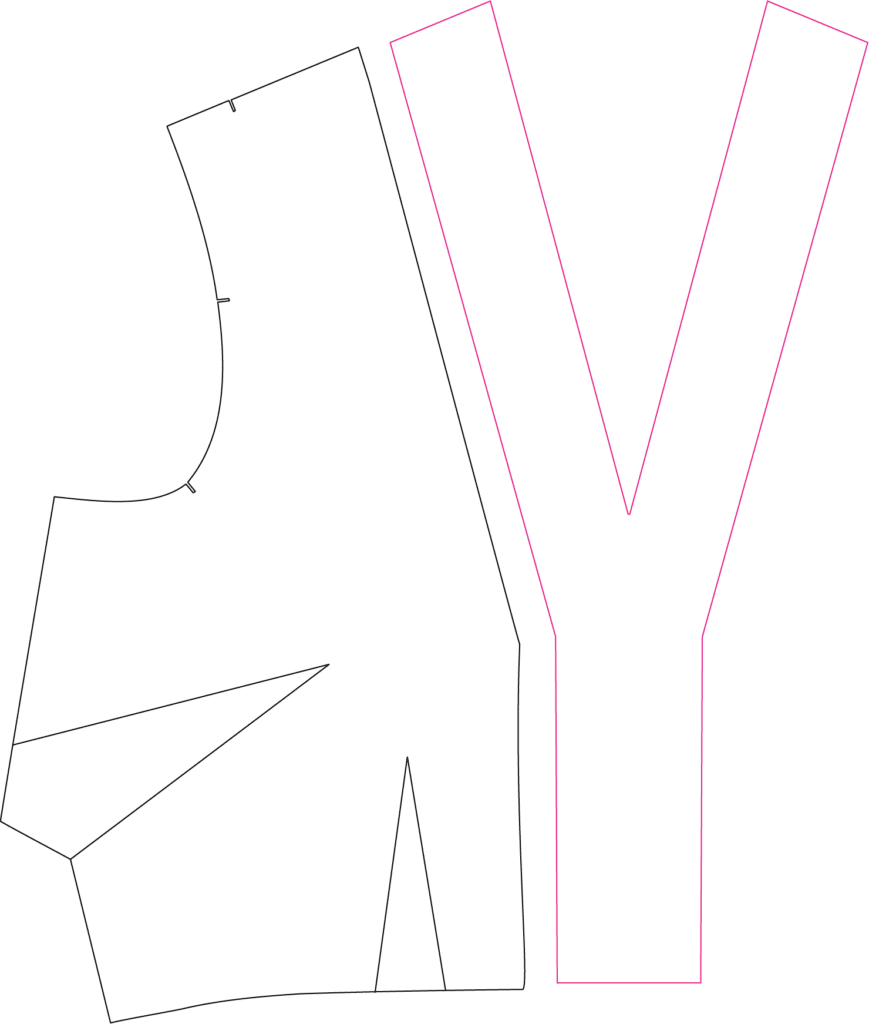
Cut along the new lines you have drawn. The piece shown in pink is half of your new yoke piece. The small triangle of paper that was above the C – A’ line can be discarded. Now you need to redraw the second half of the yoke, placing the pink piece on the fold of a new sheet of paper.
4 – RECONSTRUCTING THE SECOND HALF OF THE YOKE
Here we have traced the second half of the yoke piece, which is now ready to be used.
5 – RECONSTITUTE THE YOKE LINING
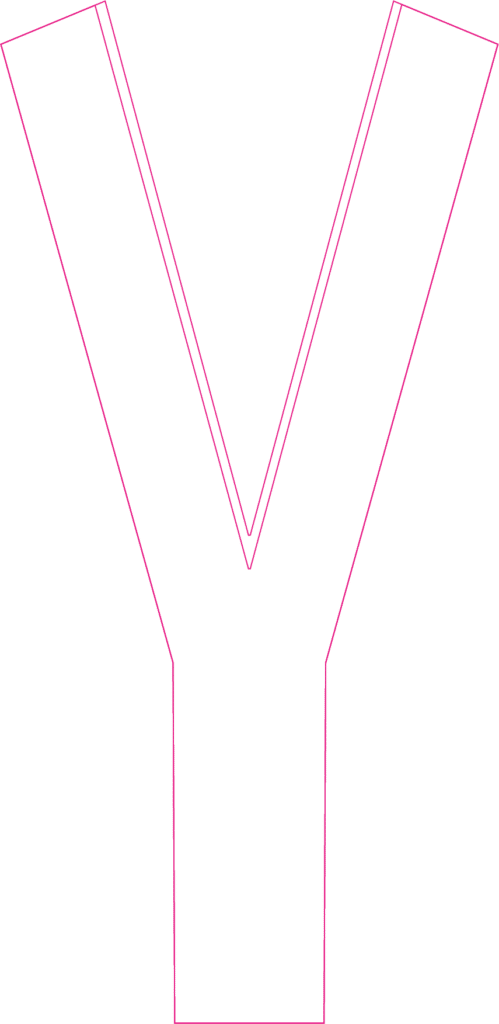
Lastly, we need to modify the yoke lining. You may be wondering why this piece exists when it looks identical to the yoke. The difference is subtle: it is simply 1mm smaller all around the neckline. This small difference allows the fabric of the yoke to roll slightly toward the inside of the dress, so the lining is not visible on the outside of the dress. So to obtain the new yoke lining piece, the easiest way is to duplicate the new yoke piece we traced, and remove 1mm from it all around the neckline, as shown here with a new line.
And that’s it, your neckline is modified. To raise the neckline, the process is exactly the same, except that this time it is a matter of placing points A’ and B’ higher than the existing points A and B, and therefore adding material and not removing it: place the pattern piece on a sheet of paper to draw the lines of the new piece. Be careful if you are raising the neckline: make sure you can still get your head through the neckline. If not, you will need to move the zipper to the back (and therefore add a seam allowance to the back bodice and back yoke pieces, which will need to be cut in two pieces).
Enjoy wearing your new dress 🙂


